
Many sellers are denied or banned by Amazon when they try creating a seller account on Amazon due to the mistakes they make while signing up for account. In this blog post we will make you aware how to create account on Amazon as a seller.
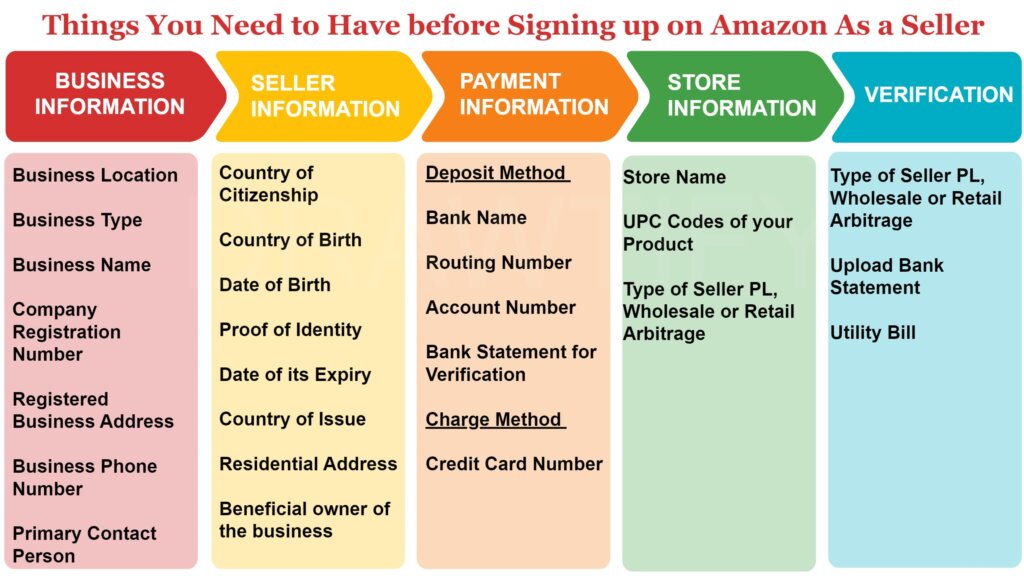
Before clicking on sign up for a seller account on Amazon you should have following things ready so that you will not be denied or banned by Amazon.
Amazon allows sellers to sign up for a Professional Account or Individual Account. Both of these accounts have different benefits.
Professional Account: Professional Account is for those sellers who plan to sell 40 or more products in a Month. Seller will have to pay a Monthly charge of $39.99 if you choose professional account.
Individual Account: Seller does not need to pay a Monthly charge but seller will be charged $0.99 per sale. Only choose this account if you can only sell few products per Month less than 40 units.
Detailed Understanding of the Information Needed by Amazon
Let us move forward and understand all the things listed above before signing up for seller account.
Business Information:
Register a Limited Liability Company (LLC) or Doing Business As (DBA) in your state of USA before signing up as a seller.
When your company is registered you will have all the documents of the company which entails all the information that Amazon will ask you.
Business Location: You need to fill in the country your business located in
Business Type: It is the structure of the business and this will also be mentioned in the company documents. Mostly it will be “Privately Owned Business”
Business Name: Business name will also be on the company documents such as XYZ LLC
Company Registered Number: You need to request Internal Revenue Service (IRS) to get an Employer Identification Number (EIN), this will the company registered number.
Registered Business Address: Registered address is the address on which your company is registered such as your home address and this will be mentioned on the company documents.
Business Phone Number: Add a phone number and verify it. This can be your mobile number as well.
Primary Contact Person: Add a primary contact person name and if this is you then add your name
Seller Information:
This is your own personal information so please have it handy before moving to seller information
Country of Citizenship: Add the country name in which you hold the citizenship status.
Country of Birth: Add the country name where you were born
Date of Birth: Add the date of birth in the field
Proof of Identity: Add the Passport number or Driving license number as proof of identity
Date of Expiry: Input expiry date of your passport or driving license whichever you have selected as proof of identity
Country of Issue: Add the country name that issued you the proof of identity
Residential Address: This will be the address where you are currently resident.
Beneficial Owner of the Company: Amazon will ask you if you are the beneficial owner of the company or if you are a legal representative of the company. Select the respective option
Payment Information:
Amazon asks you to add 2 payment methods.
- Deposit Method
- Charge Method
Deposit Method:
Through this payment channel Amazon will pay the sellers all the money that they have collected from customer. This will be the payment receiving channel for sellers from Amazon.
Deposit method will always be a Bank account in USA. Open a bank account on the same details that you used while opening the Amazon account. Input your account details on sign up when asked in the payment information.
Keep a bank statement of your bank with you for verification purposes.
Charge Method:
Through this payment channel Amazon will charge the seller for the monthly payments. Charge Method will always be credit card, do not ever enter debit card details.
Store Information:
Amazon will ask you to input store and product information on this page.
Store Name: Think of a store name beforehand so that when you are in signing up process you can just input the store name and proceed further. Store name can be your company name as well.
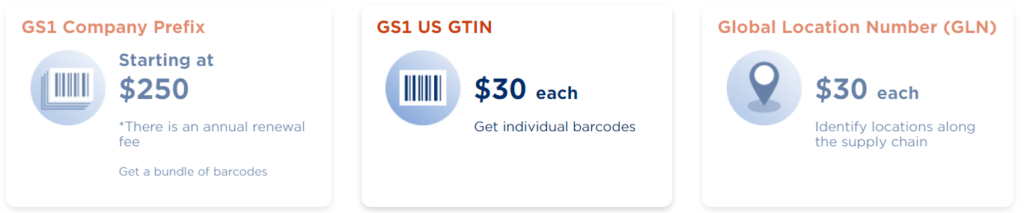
UPC for Your Products: UPC is Universal Product Code. This code is type of a code printed on retail product packaging. This is to identify product features such as item, size, color and brand name. You must have UPC for your products if you wish to list your products on Amazon.
You can buy UPC for your product from the below link,
https://www.gs1us.org/upcs-barcodes-prefixes/amazon/barcodes-for-amazon
You can buy 1 UPC in $30 or if you have multiple products you can buy $250 package.
If you have already bought the UPC click on yes I have the UPC for the products.
Type of Seller: Amazon asks you if you are the manufacturer, brand owner, agent or representative of the brand. In this you need to click “Yes” if you are planning to do Private Label on Amazon but if you are planning to do Wholesale or Retail Arbitrage on Amazon then click on “No”.
If you click on “Yes” then Amazon will ask you if you have a trade mark registered for your brand or not. It is really important to register your trademark to sell on Amazon. It has variety of benefits and it secures your brand from getting hijacked.
I would suggest you to initiate the process of brand registry beforehand as it takes around 6+ Months to register your brand.
Verification:
Finally Amazon will ask you to upload documents such as proof of identity and bank statement.
Proof of Identity: If you have mentioned Passport number when filling the form then scan and upload your passport on Amazon.
Bank Statement: Upload a PDF of your Bank statement on Amazon.
Utility Bill: On some occasions Amazon asks you to upload a utility bill of the address where your company is registered at. I would ask you to have it ready so that there will not be any hurdle in opening your Amazon seller account.
Reasons Why Amazon Rejects or Ban Seller’s Account:
There are various reasons why Amazon rejects or bans seller’s accounts and nobody likes to see a rejection therefore understand the below issues and avoid it to be safe
Duplicate Account:
If you have already opened an account previously on the same address, same IP, same proof of identity or any similar details then Amazon will reject your request. Always remember to use unique details that you have never used or no one has used before.
Domain Email:
Before signing up on Amazon buy your domain email with the same company name that you have registered because if you use any personal email to sign up such as gmail, outlook or any other email id then Amazon doubts the credentials.
Using Debit Card:
Always use Credit card for charge method so Amazon will not reject your request.
Suspicious Activities:
Never fudge your proof of identity, bank statement or anything for any reason because Amazon has strict guidelines for scammers. Amazon ban all the suspicious account for life and you can never open a seller account.
Document Submission for Verification:
There are so many occasions where Amazon rejects your application because format of submitted document is not correct or details are not visible. Below are all probable issues for which Amazon will reject your application.
Accepted Criteria for Documents:
- ID’s should be in Color Scans (Black and White is not accepted)
- ID must display a name that matches the name that you used to apply for Amazon seller account
- Date of birth should also match the given DOB to Amazon when applying
- If submitting a passport or any other acceptable ID document then make sure your signature is visible
- Bank Statement must business address and business name
- Bank Statement must not be older than 90 days
- Bank logo, account number, business address, name or point of contact must be clearly visible
- Accepted utility bills are electricity, gas, water, waste, internet, landline but mobile phone bills are not accepted.
- Utility bills must not be older than 90 days
- Entire Document should be visible
- Format should be PDF, PNG, Tiff, Tif, JPG and JPEG
- Documents should be in accepted language (English, Arabic, Chinese, German, Italian, Spanish, French, Dutch, Turkish or Japanese). If document is not in one of the mentioned languages then applicant is required to provide a copy of the passport and a notarized translated document in one of the accepted language.
- Document must be clear and not blurry
- Should not be a screenshot
- Should not be expired
- File size should be less than 10 mb
- File should be authentic and unaltered
Follow the above instruction for applying on Amazon and avoid the mistakes other sellers make to secure Amazon seller account smoothly. One last thing is to have patience after applying as Amazon takes time in responding to your application. It can be within a week or over a month so have patience.
Conclusion:
I have mentioned all the possible things from my experience that you would need to successfully apply for Amazon seller account. If you would have any difficulty in signing up on Amazon as a seller, you can comment below